

Our Monthly Journal
december 2022
We're so excited to share another monthly journal written by the lovely Lola Jones, also known as @pocketfullofbuttercups on Instagram. Lola is a wonderful photographer and all round creator of beautiful content, raising her twin daughters Maya and Chloe & her baby Thea from her house near the Peak District. Each month she will give us a small glimpse into her world, inspiring you with activity ideas, recipes and more.
The last month of the year is always full on for us and probably for most of you too. It can be hard to find time to slow down and truly enjoy this special time of year. But beautiful seasonal crafts don’t have to be complicated or time consuming.
In this journal we are sharing a few more festive/winter crafts with you. All are so simple and require minimal tools and resources.
Our final two journals of the year will be dedicated to winter and festive preparations. I hope you find them interesting and inspiring. Should you decide to have a go at any activities, we would really love to see them. Please tag us #inspiredbynelliequats


PAPER BAG STARS
I made these for the first time last year and was really impressed just how easy they are to make and how spectacular they look as a Christmas decoration. These stars are also very forgiving and do not have to be absolutely perfect.
All you need is:
- paper bags (I used two different sizes 30x15.5x10cm and 24x13x8cm)
- Glue
- Scissors
- Stapler
- Hole punch and string if you wish to hang your stars
To make your stars, lay the first paper bag facing up (the folded bottom of the bag should be facing down) and apply glue in an upside down “T” shape (so run the glue along the bottom of the bag and up the middle of it). Next lay the second paper bag on top. Make sure that all the edges are even and straight. Continue gluing bag after bag until you have a stack of somewhere between 7-12 bags. Depending on the quality and thickness of your bags, you may use more or less. The thicker the stack, the harder it will be to cut, so play around with numbers.
Once you have your stack, let the glue dry for a couple of minutes. Then draw a shape you want to cut with a pencil. The steeper the corners, the pointier your star will be. I did these three designs:
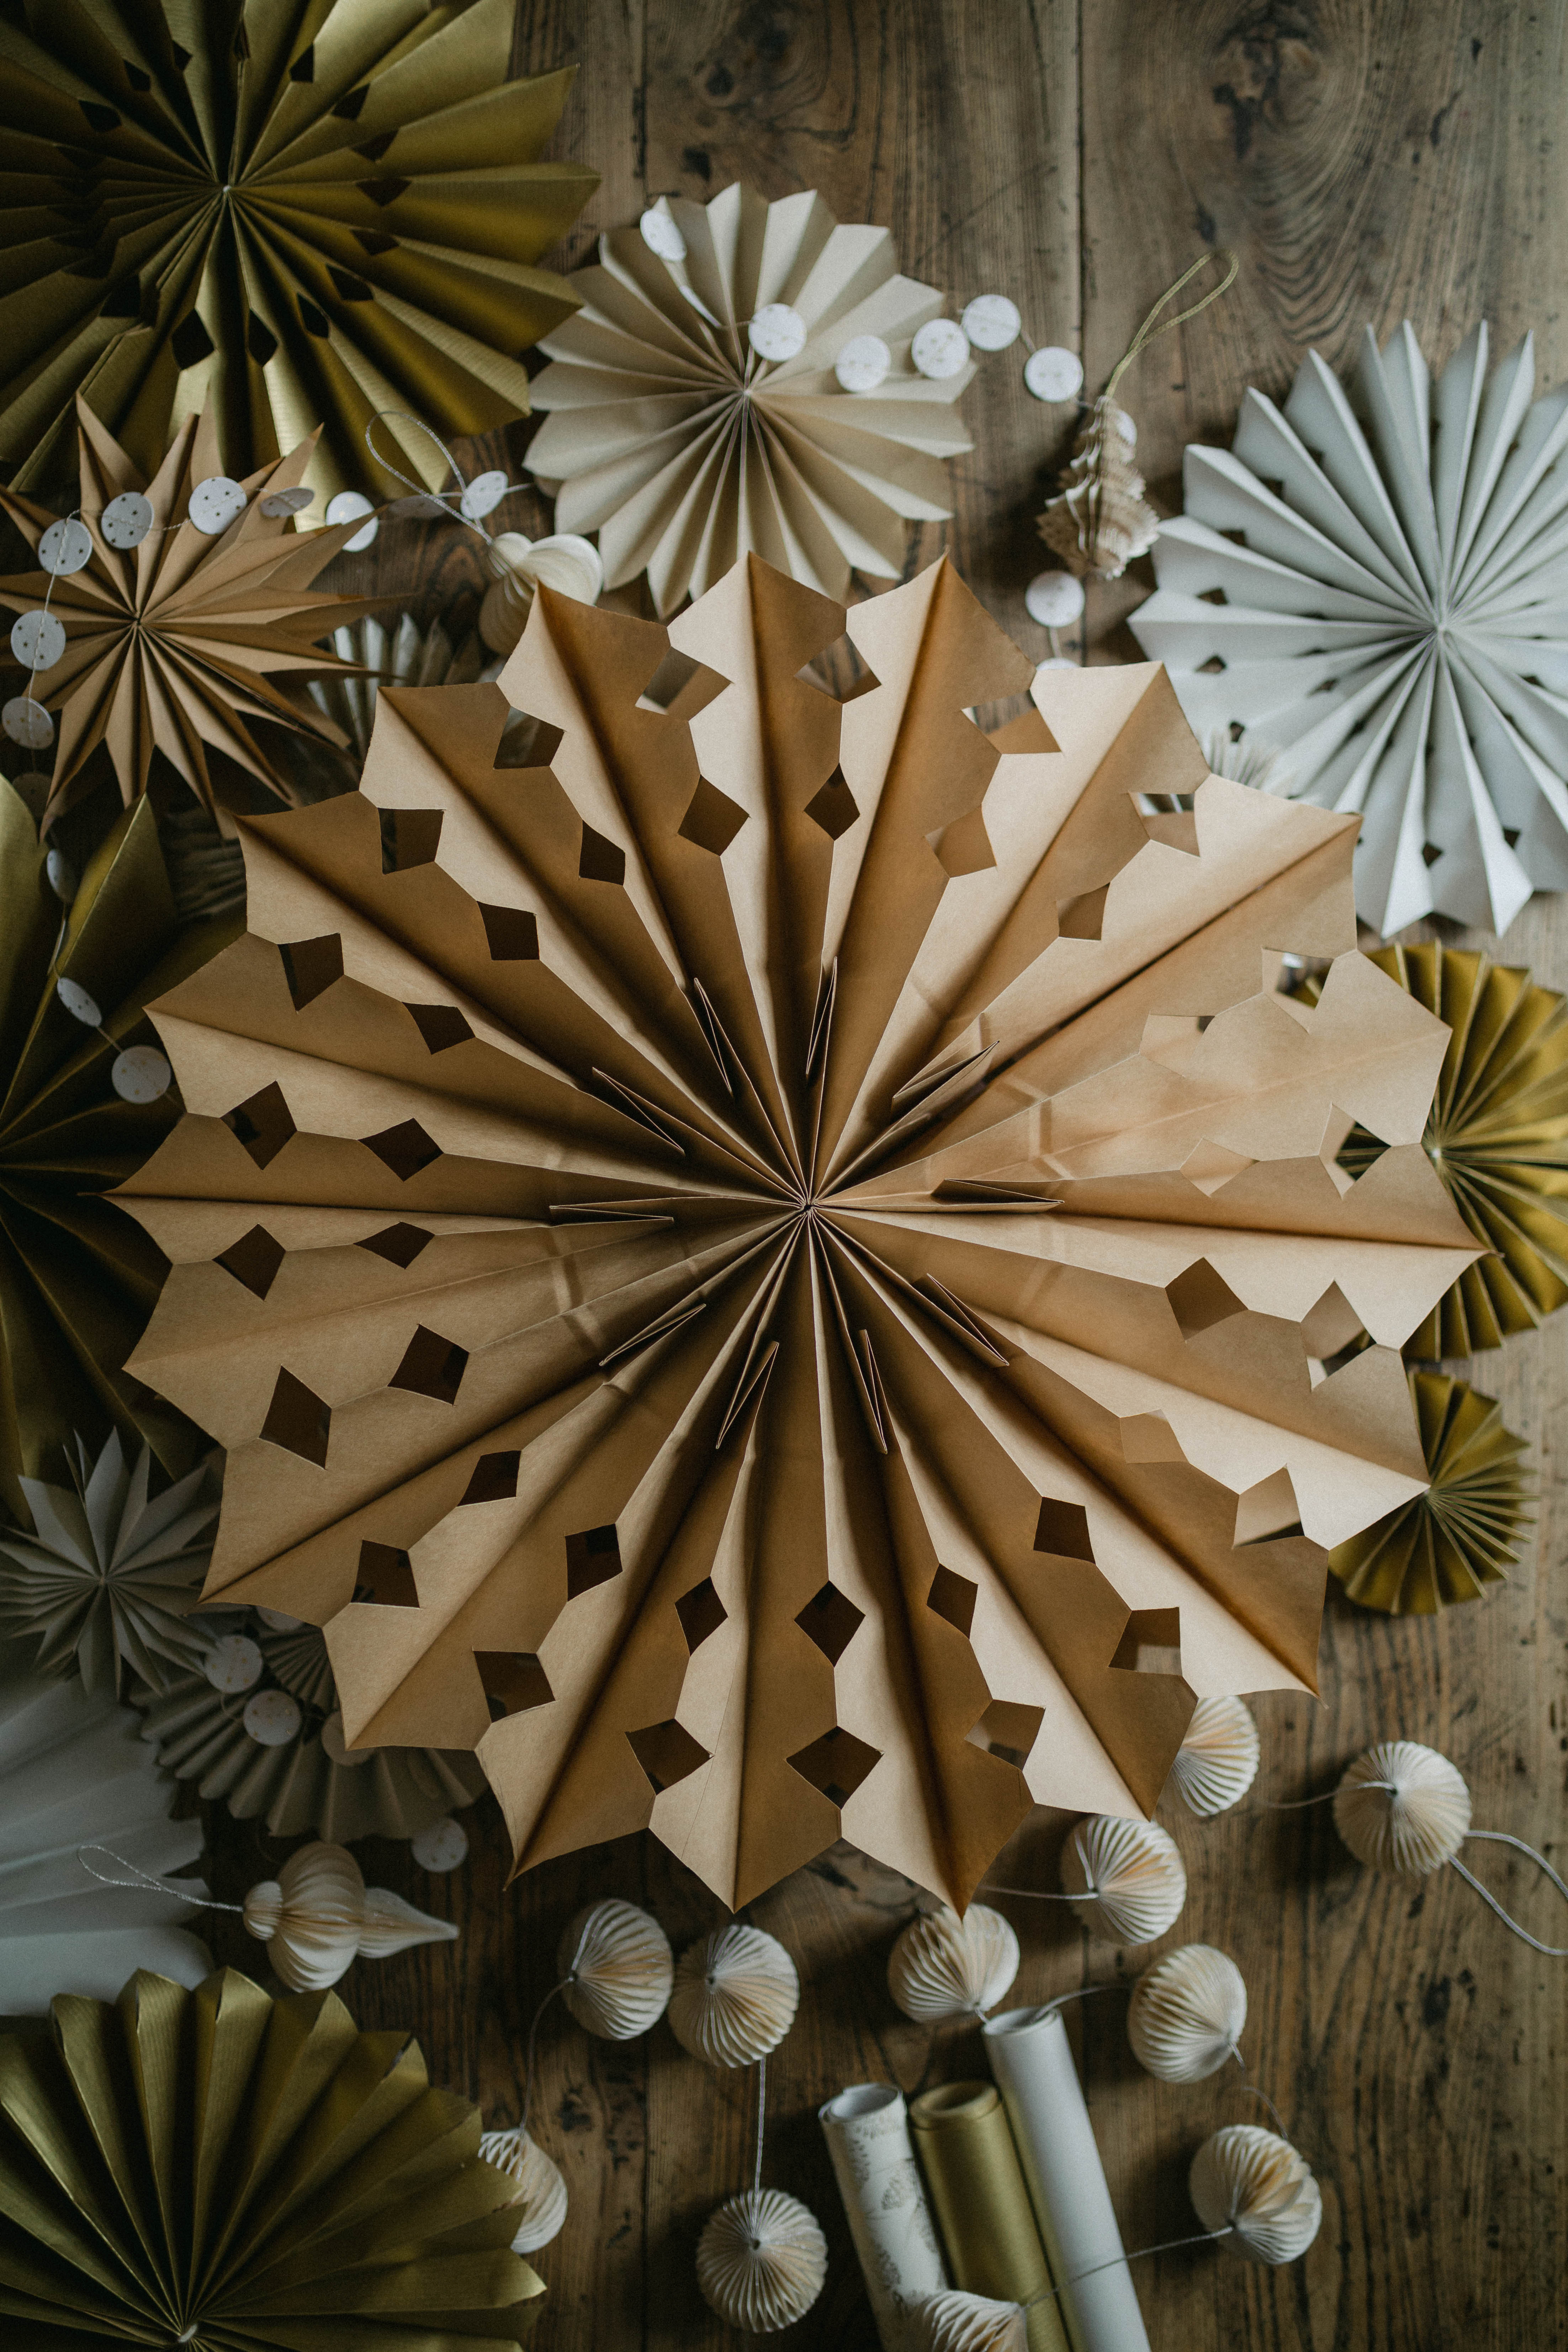


Cut out your designs. And then watch your stars come to life as you open them up. Next use the stapler to connect the two loose ends. Or use a hole punch and a string to hang your star.

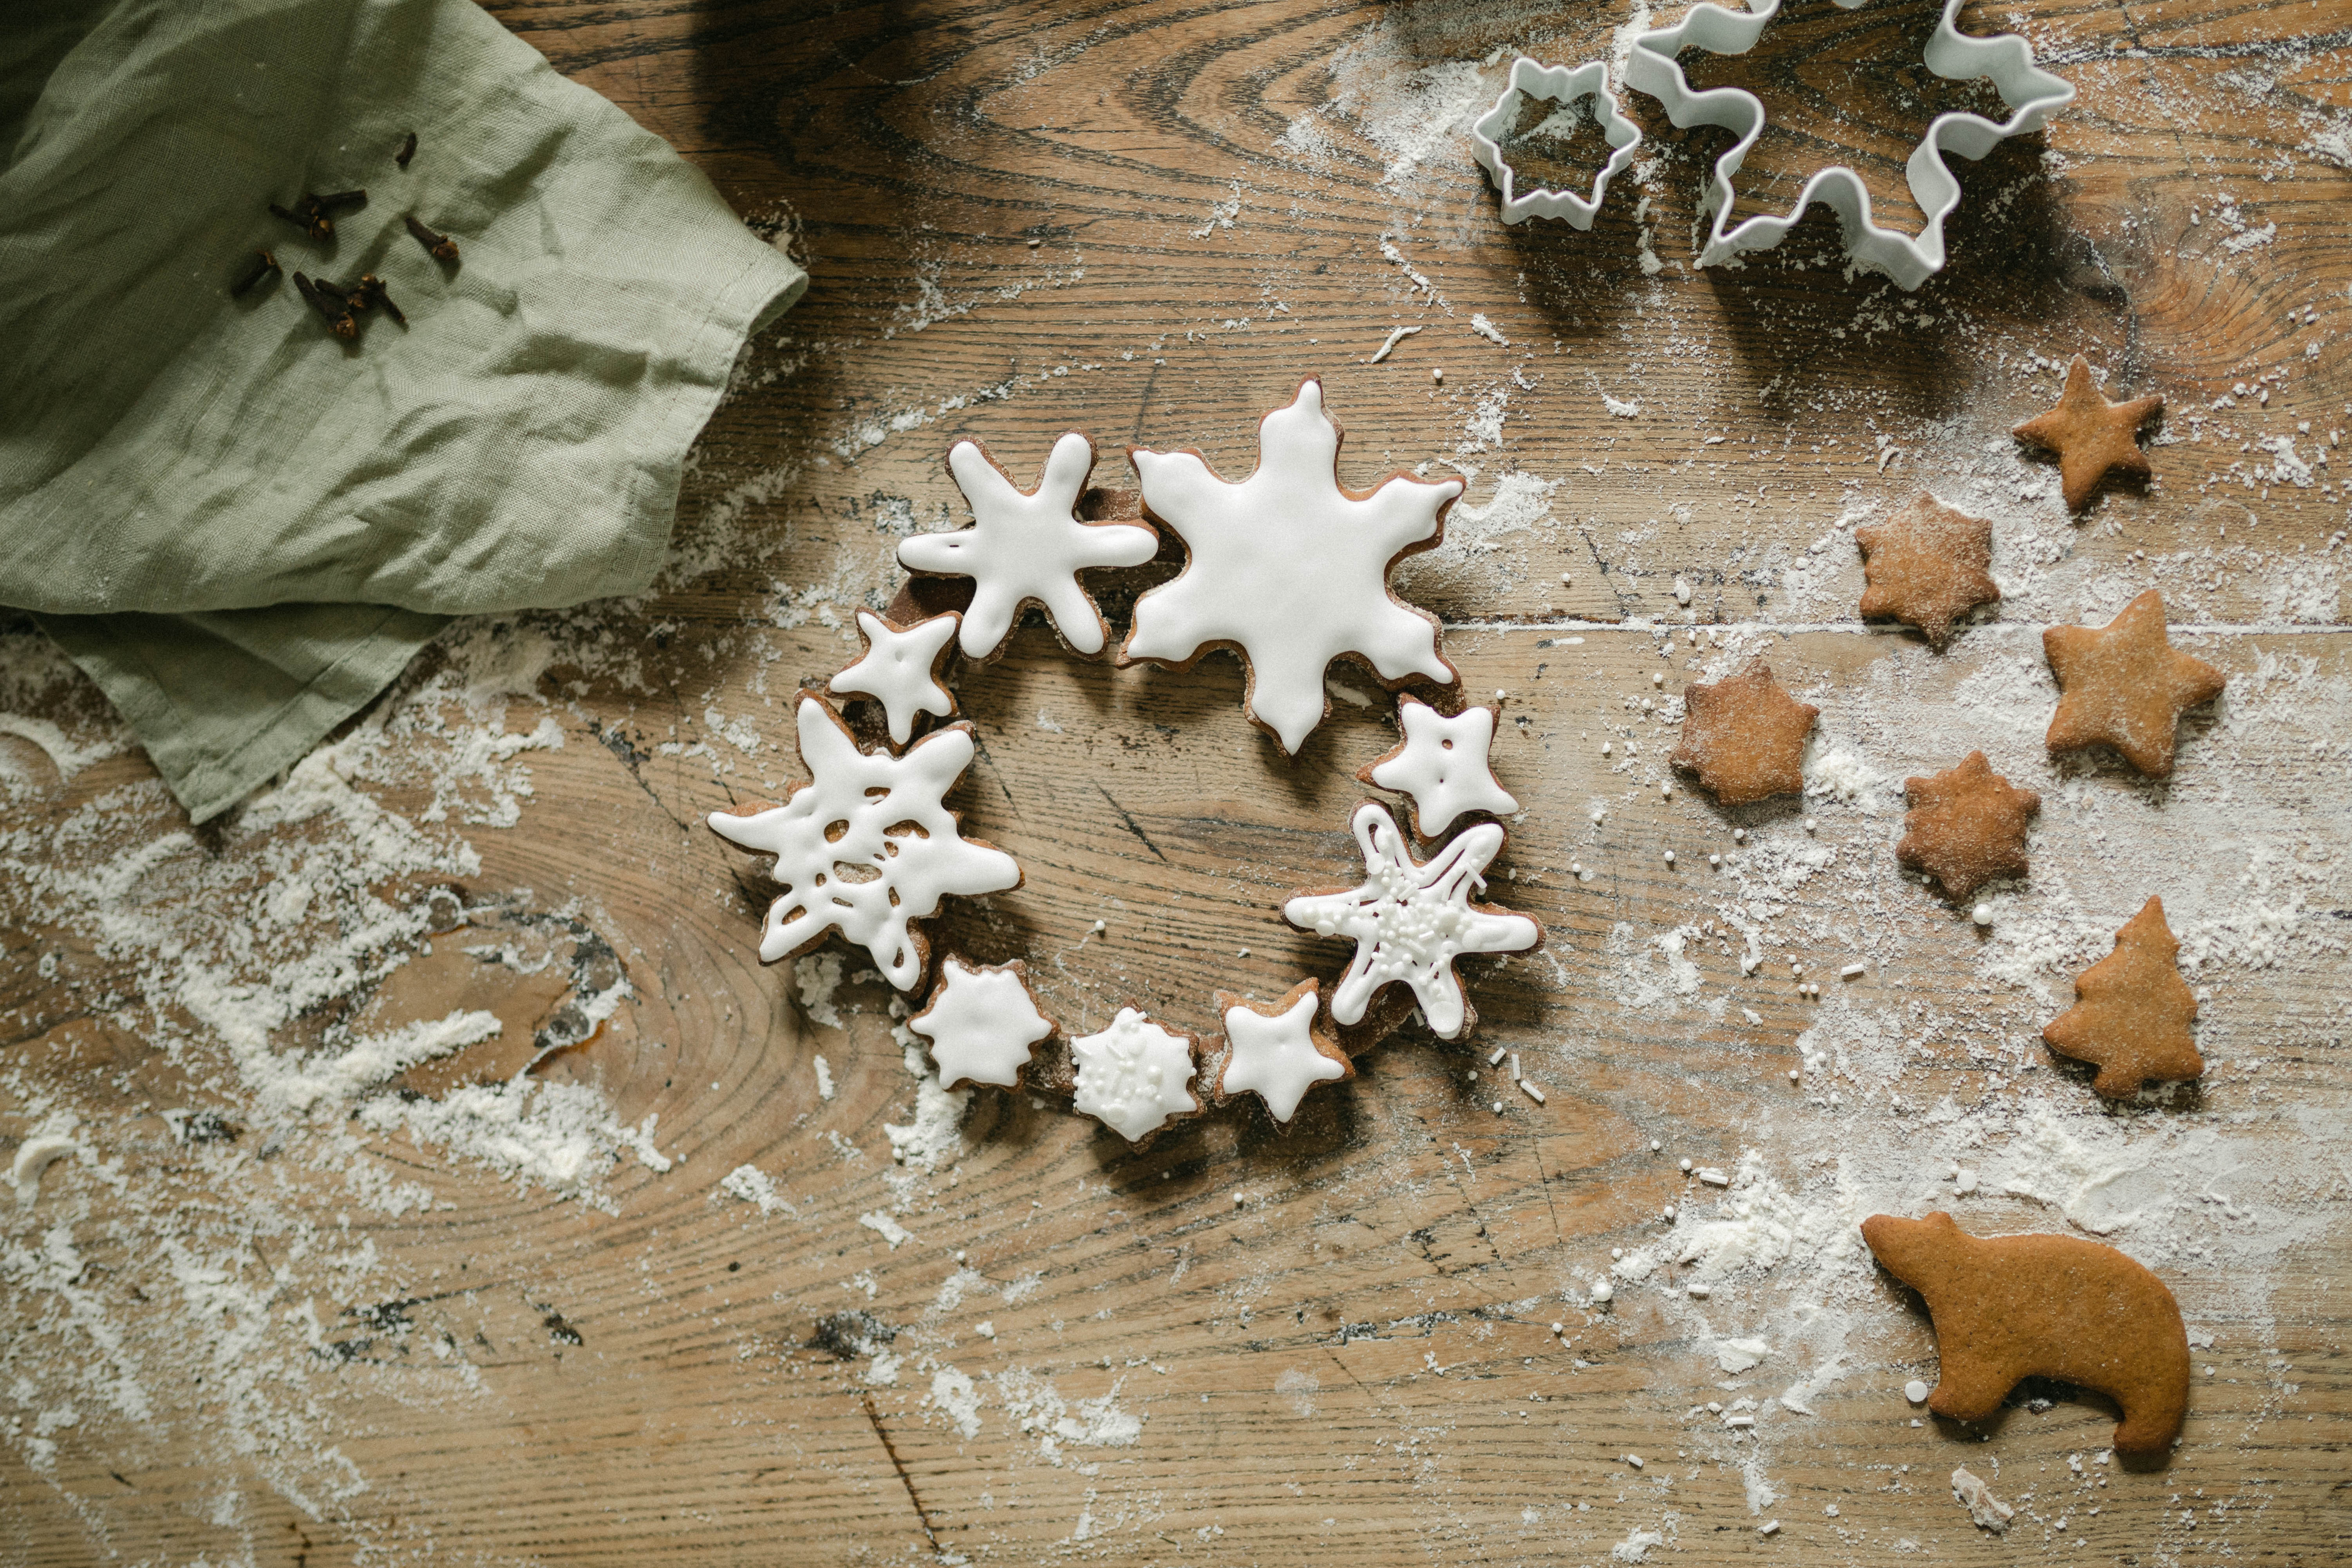
GINGERBREAD BISCUIT WREATH
We bake gingerbread on repeat throughout December with my girls. Over the years it has definitely become one of our favourite traditions. This year, instead of just making simple biscuits, we decided to make a biscuit wreath. Just as simple to make and only a couple more extra steps to the whole process, but the result is unique and so beautiful.
This is the recipe we use every year and it makes the yummiest gingerbread.
You will need:
- 100g butter (we use unsalted)
- 75ml black treacle
- 135g granulated sugar
- 2tsp. Ground cinnamon
- 2tsp. Ground ginger
- 1tsp. Ground cloves
- 3/4tsp. Ground cardamom
- 75ml double cream
- 300g plain flour
- 1 1/2tsp. baking soda
- pinch of salt
For the icing:
- 1 egg white
- 200g icing sugar
- A few drops of freshly squeezed lemon juice


Combine the butter, syrup and sugar in a saucepan and place over a medium heat. When the mixture is melted stir in the spices. Remove the pan from the heat and let cool for a few minutes before adding the cream.
Next combine the flour, baking soda and salt in a bowl. Pour the wet ingredients from the pan and stir until a soft dough forms. Cover and place in the fridge to rest for 24hrs.
When ready to bake, take the dough out of the fridge about 20 min before. Preheat the oven to about 200C.
On a floured surface, roll out the dough. We weren’t too precise when rolling our dough, but we tried to keep it thin, so the biscuits don’t puff-up when in the oven and are crisp.
To make a wreath base, we placed a small saucer on top of the rolled dough and cut the circle following the edge of the saucer with a knife. Then we removed the saucer and cut a smaller circle inside. We then used the remaining dough to cut to the biscuits to decorate the wreath with.
Carefully transfer your wreath base and the biscuits to the baking sheets lined with greaseproof paper and bake for 4-7 minutes depending on the size of your biscuits. Smaller shapes will take less time to bake.
Let the biscuits cool completely before decorating.
To make the icing, mix the egg white with the sugar and add a few drops of lemon juice. We kept our icing white, but you may wish to add some colour.
To decorate your wreath, first finalise your design by placing the un-iced biscuits on the wreath base. Once you are happy with the design, start decorating the individual biscuits with icing. (We used a piping bag with a small round nozzle). Let the icing dry before assembling the wreath. We used the same icing to attach the biscuits to the base. Just add a drop of icing on to the wreath base where you wish to place a biscuit and sit the biscuit on top. Let it set. Continue until your wreath is decorated.
Wouldn’t this make a lovely homemade Christmas gift?

DIY CLAY CANDLE STANDS
Another simple craft that adults and children are sure to enjoy. And would also make a sweet handmade gift to someone this winter.
You will need:
- DAS white air hardening modelling clay
- Rolling pin
- Cookie cutters (depending on the size of your candles you can use bigger or smaller ones and make them thinner or thicker)
- Candles
Start by rolling out the clay. Consider how thick and heavy your candles are. Keep the clay thick if the candles are tall and thick as they will need good support. We used thin candles (about 1cm in diameter at the base and about 18cm tall).Next cut out the shapes with cookie cutters. We used stars and snowflakes as they are pointy and will support the candle all around.Once you cut your holders out, while the clay is still flexible, push your candle in by twisting it gently. Once your candle is stable and straight, leave the holder to air dry (ours were dry in a couple of days, but it will depend on how thick your holders are).
Please remember to never leave the burning candle unattended. Keep the burning candles out of reach of young children.


